How To Do Compaction Testing
Performing compaction testing using a nuclear density gauge may seem at first to be a simple task: pound the pin, depress the handle, and take the reading. As easy it may seem at first glance it is actually an involved job requiring judgement and experience as well as proper knowledge of compaction techniques, equipment, and soil types. In this article, I will cover what I have learned as a geotechnical engineer in training doing compaction testing.
The Gauge
The gauge is a tool. It is not the be-all and end-all for you to tell the contractor compaction is completed and give the OK to continue backfilling. There are false positives that may be encountered and judgement that must be exercised. An important first step is understanding the gauge.
First of all, be sure to know how to navigate all the menus the gauge has. Many gauges have a Proctor density setting and a Marshall density setting. Make sure you know how to navigate from one setting to another, as this process can be confusing. There is nothing worse than going out to do soil compaction and having your gauge set to Marshall density and not knowing how to change it (I know because I’ve been there!). Know your companies policy on calibration, and follow it.
Arriving on Site
Before leaving for the assigned site, make sure you have all the necessary tools and information to complete compaction testing.
You will need to know:
- What type(s) of soil that is being compacted
- The proctor densities for each type of soil
- The percent compaction required by the design engineer for each soil type
- Maximum lift size for each soil type
- Who to report to when arriving
What you need to bring:
- Nuclear density gauge
- Hammer/Pin/Steel Mat
- Site plan
- Logbook to record results
- Personal Protective Equipment (PPE)
The gauge comes with a block of plastic with a known density and moisture. Set the gauge on the block and turn it on, this usually takes a few minutes. After the gauge is on, run the calibration test and record the results in the logbook. Set the proctor density to the density specified by the design engineer. The gauge is now ready to be used.
Performing Compaction Testing
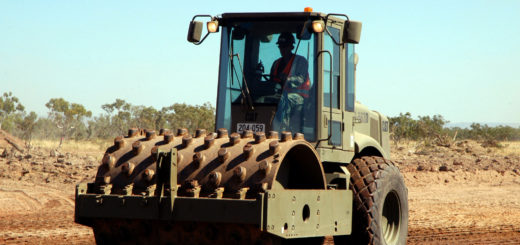
First, identify what soil is to be tested. If you have drawings of the site, make sure that the backfill being used matches the description and the assigned proctor value. Note what type of equipment is being used to compact the material. A fine grained soil such as a silty clay should be compacted with a sheepsfoot or padfoot roller, although some flat plate compaction equipment can work. A granular material needs to be compacted with a flat plate compactor.
Fine Grained Soil
Fine grained soil is the most difficult to test as the surface is usually not smooth and the pin must be hammered into the soil. First, set the gauge to direct transmission mode. Flatten a portion of the soil so you can place the steel plate on a relatively smooth surface. Now, pound the plate into the soil until it lies flush. Hammer the pin as deep as you can into the soil and remove the plate and pin. This area of the soil is now ready to test. Place the gauge on the flat surface created by the plate, making sure it sits flush so accurate results can be collected. Depress the pin into the hole as far as possible. Make sure the gauge depth setting corresponds to the depth of the pin, and begin the test. The gauge emits radiation at all times, so always try to minimize the time you spend near the gauge.
Coarse Grained Soil
Coarse grained soils are the tester’s dream. Easy, quick, and the pin doesn’t get stuck. First, walk along the backfilled area. Feel how hard the soil feels beneath your feet. Once you’ve done this enough times over your career you will be able to recognize with a fairly high certainty if the soil will pass before you even test it. After you’ve scouted the backfill area, locate flat portions of the surface and place the gauge on the soil, again making sure it sits flush. Sometimes you can flatten a portion of the soil with the steel plate. Hammer the pin, depress the rod into the soil and perform the test.