4 Simple Factors Affecting Soil Compaction
This article is primarily aimed at contractors looking to pass their soil compaction tests more quickly but is also a good refresher for geotechnical technicians to review. And check out our friends article on a similar topic.
To a lot of contractors, compaction is simply “hit the dirt with heavy metal until it’s hard enough”, and they’re not wrong. Compaction is a simple process, but as contractors, engineers, and technicians all know – it can take a long time. Especially if it’s not done right.
I was recently asked by the owner of a small contracting company how he could pass his soil density tests more quickly. I love working with contractors like this because I want the job to get done quickly too – but I’ve also got to make sure it’s done right.
It’s nice to be on the same team.
So I gave him a quick rundown on several factors that affect his ability to pass a soil compaction test.
Moisture Content
There is actually quite a bit of “sciencey” stuff to unpack here. If you’re interested, you can read about how moisture content affects compaction in this article.
Here, I will just give the basics that will help you pass soil compaction tests quickly.
Far and away, moisture content is the single most important soil characteristic that will affect your ability to pass a soil compaction test.
If you’re working with a good soil testing firm, they should have collected a sample of the backfill soil you will be using and performed a Proctor test on it.
The Proctor test will tell them, and you, the maximum dry density of the soil, and the optimum moisture content to reach this maximum density.
A typical specification for backfill is 98% of the Proctor density. Given that the Proctor density can most easily be achieved at the optimum moisture content, trying to compact soil that isn’t close to its optimum moisture content is a losing battle.
Before beginning work:
- Ask the testing company if they’ve completed a Proctor
- Ask the testing company for the optimum moisture content of the soil you’re using
- Ask the testing company what the current moisture content of the soil is – does it need to be dried or wetted?
Make sure you know these things before beginning. Being ready to go from the onset will make your project move much quicker.
Compaction Equipment
Depending on the type of soil you are working with – coarse grained (sand, gravel, etc) or fine grained (silt, clay, etc), the type of compaction equipment you use should be different.
If you’re not sure what type of soil you’re working with, ask the technician or geotechnical engineer – or just ask them what kind of packer you should be using for compaction.
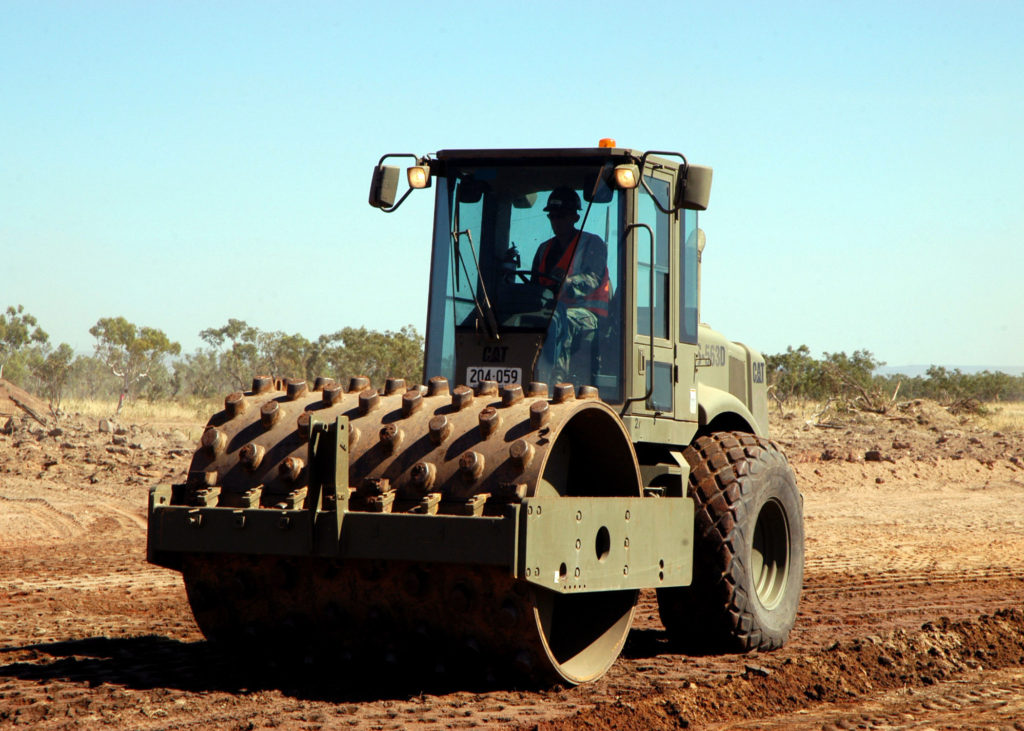
A coarse grained soil should be packed using a flat plate vibratory tamper or drum roller. Using a padfoot or sheepfoot roller on coarse grained soils will not work and you will never reach 98% compaction.
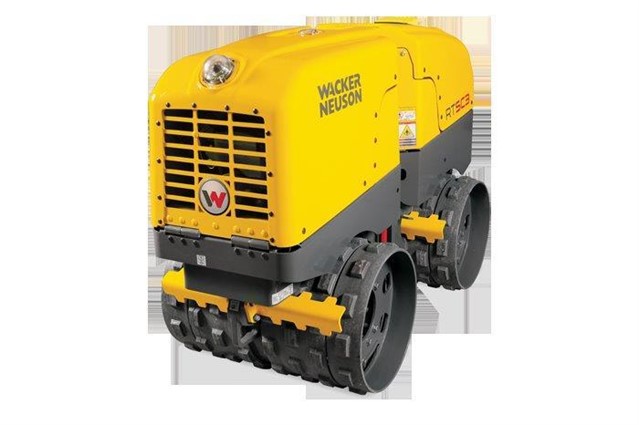
Fine grained soils should be packed using a padfoot or sheepsfoot roller, although you can get away with using heavy enough hoe packs. Jumping jacks also work for tight spaces.
Lift Height
Of course, you want to put down a big lift. A bigger lift means less lifts, less compaction, a quicker job, and more profit.
If you want to put down big lifts, you better have a big packer. So many times I come to site and the guys are putting down one foot thick lifts, then running over it with a dinky little roller and then get mad at me when it doesn’t pass after 10 tries.
If you’re using a packer like the one shown below, put down 8 inch uncompacted lifts AT MOST.
Generally, a 6 to 8-inch lift will allow you to pass compaction tests easily and quickly. If you’re consistently passing, try upping the lift height and get feedback from the soil tester.
In general, you want to start with small lifts, then work your way up as you see how your soil reacts to compaction, and how heavy your machine is, its vibration effectiveness, etc.
Soil Uniformity
As discussed above, the testing firm should have collected a sample of the backfill soil for a Proctor test.
The Proctor test they’ve performed only applies to the soil they tested. Not everything on the site. So if you’ve got several stockpiles of soil, you’ve got to make sure that they’ve sampled the correct stockpile, but also that you’re not mixing other soils into the stockpile that was tested.
Especially harmful to compaction testing are organic materials mixed into the backfill material. Not only will a good geotechnical technician visually see the organic material and ask for it to be removed, but his nuclear densometer will also give skewed results because of the way it interacts with carbon (organic) molecules.
The Testers Ideal Situation
The testers ideal situation should be what you aim for because he wants the job done just as much as you do. But he needs to stop you if specifications aren’t met. Get on the same page and get your jobs done quick!
If you read nothing else, this list will tell you how to make things go faster.
- Proctor test on the correct backfill soil has been performed a week in advance
- deliver the soil to the testing company or attend the site and show the tester which stockpile you intend to use
- Backfill stockpile has not been mixed with any other excavated material or organics
- The contractor is using lift heights appropriate for his compaction equipment
- Lift heights are never greater than 1 foot after compaction
- The contractor has the soil at the correct moisture content
- The contractor is willing to dry or wet the soil to achieve the correct optimum moisture content
- Quicklime can quickly dry soils
- Sands and gravels are compacted with flat plate or drum rollers
- Clay is compacted with a padfoot/sheepsfoot roller or hoepack or jumping jack in small areas
And that’s basically it!